Sunday, 27 October 2013

APPLE CHUTNEY


I didn't get a massive amount of apples in the garden this year. My poor tree only produced a total of 11 apples, and two apples were lost to Bo once she realised that apples are toys you can eat once you're done playing with them. I'm not entirely sure why there was such a bad apple harvest, considering a few years ago there were so many apples my mom managed to fill half the basement with jars of apple jelly, and considering the plum tree was full this year. I was determined to make something out of the apples though, so I bought a couple of extras and decided to turn my tiny little harvest into chutney.

This chutney is both quick and simple to make, and it'll make your whole house smell delicious. It'll mature and the flavours will develop in the jars, and will last up to a year in the sealed jars. Though obviously if you want some straight away, I wouldn't hold it against you.


Apple chutney recipe (makes about 1 kg of chutney):
1 kg cooking apples
1 large onion
250 g raisins
250 g sugar
1 tsp salt
2 tsp ginger
2 tsp mustard seeds
1 tsp nutmeg
500 g cider vinegar


Directions: 
Peel and core apples, and cut into chunks. Finely chop the onion. Combine all the ingredients in a large pot. Bring to a boil, then let it simmer for half an hour until thick. Transfer to sterilized jars, and seal.

Apple chutney works great with a pork roast, or even just with some cheese on toast or crisp bread. Cheesy toast and chutney is always a winner.


Sunday, 20 October 2013

TABLE MAKEOVER

So this is kind of old news, as it was actually a few months ago I revamped this table, so I’ve already been using it for a while now. I had plans of posting it then, but somehow got a bit side-tracked. But without further ado, here is a very belated post of my table makeover!

Since I moved back to Norway, I’ve been living in my parents’ old house. When I moved in, they were living in Spain but still had all their furniture in the house, so I didn’t really need anything. They’ve since returned to Norway, but have moved into a new flat and thus taken majority of their furniture with them. One of the first things I needed when they moved out was a kitchen table, so I went on finn.no and found a round wooden table with 6 sturdy chairs a local pastor was selling for peanuts. I wasn’t massively into the super strong blue it was painted though (see before phone pic taken at the pastor’s house), so I decided to renew it a bit and give it a lick of white paint. It was a much longer process than what I had anticipated, and I ended up having to do 3 - 4 coats before I was satisfied as the blue was so strong it kept shining through. Very happy with the final result though, and looking forward to eating lots of meals here!  


Sunday, 13 October 2013

LOMOGRAPHY OKTOMAT

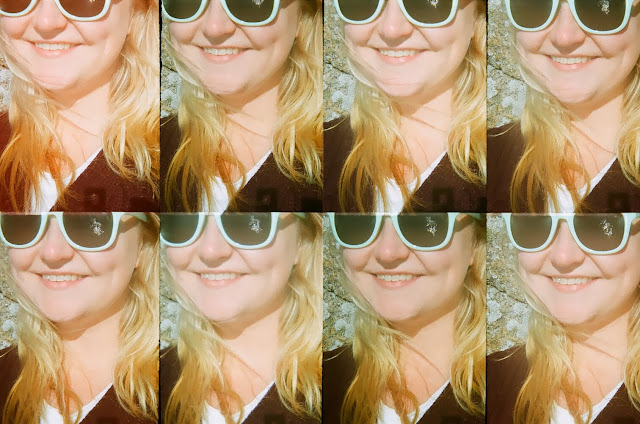
I gave up on this camera a long time ago. I was so excited when I bought it, roughly four years ago. The first film turned out awesome. There were light leaks and distorted colors, and the photo sequences were like mini analog movies. I brought the camera with me to California, and took some awesome pictures there too: a couple shots from Coachella, my friend dropping his ice cream in Dolores Park—but when I got the film developed it was blank. I was devastated and didn’t touch the camera for about 2 years, until now. I assumed it was broken, it was only a plastic toy camera after all. But then for some reason, I decided to try it out again and brought the camera with me to my parents cabin in Hausvik. I had pretty low expectations when I handed in two rolls of film, and sadly I only got one roll back. But the photos that actually got successfully developed reminded me all over again why I was so excited about this camera in the first place. 


Since it captures the subject in 8 different lenses over 2.5 seconds, it’s great for capturing movement. And because of this, I have a tendency to point the camera at people and commanding them about. “Jump!” “Do something!”  “Move about!” Graeme usually responds with a groan. Bo's a bit more cooperative. 


Can't wait to use this camera lots more!

Wednesday, 9 October 2013

DIY PET TIPI


Our Jack Russell Bo is spoiled. She’s had about 20 kongs in her lifetime, and she’s destroyed them all within minutes. She has several outfits, including a sweater bought in Paris, a collar bought in Palm Springs, not to mention a traditional Norwegian Marius sweater my mom has knitted for her. She has several beds located around the house, yet she’s allowed up on the furniture anyway and prefers to spend her days lying about there. She complains if she doesn't get tucked in at night. She refuses to go outside if it’s raining and has to be the center of attention at all times. She requires special food, scientifically developed by Scottish veterinarians. She’s a complete diva, and if it wasn't for the fact that she’s so cute she would not get away with it. But every time she snuggles up and falls asleep on our laps, we melt and forget everything. And now she also has a tipi to hide in. Why? Why the hell not. To be fair, if I felt I could justify it I’d be making a tipi for myself (why am I not an auntie yet?).

And if you’d like to spoil your pet and make a tipi for them as well, you will need approximately 2 meters fabric, 5 bamboo sticks, some string (not pictured) and some twine. This tipi will fit a small dog, so if your pet is smaller/bigger, you will obviously need to adjust. I bought my bamboo sticks at a gardening center for 3 kroner each. They measured 107 cm, but I cut them down to about 95 cm to fit the tipi better. If you’d like to decorate the tipi as well like I did, you will need some sort of stamp. I used a simple triangle lino stamp I made to decorate mine.

Directions:
Cut your pattern out of some paper/newspaper. The pattern is based on a single right triangle that measures 22.5 cm by 83 cm, so you will only need to cut one. Using this pattern, cut two right triangles of fabric, and four isosceles triangles of fabric by folding the fabric and lining the fold against the edge of the triangle pattern. Remember to add about 2 cm for seam allowance. You will end up with the following pieces of fabric, where the two right triangles will end up being the entry to the tipi,  and the four isosceles triangles will be the four walls.


Now for some sewing. Start by hemming the bottom edges of all the pieces. Hemming done, take your two right triangles, line them up with the right sides facing each other and sew the top third of the second longest side (i.e. not the hypotenuse and not the bottom bit you've just hemmed). Hem the rest of the sides. This will be the entrance to the tipi and should now roughly be the same size as your other sides.


Sew all the sides together. Leave about 5 cm at the top to make room for the bamboo sticks to come out, and sew approximately 10 cm of string into each side at the bottom, top and in the middle. (These will be to tie the tipi to the bamboo sticks later to make it a bit more stable.) It's an advantage if you sew a bit straighter than I did, though I'm sure your pet won't mind.


Hem the tops of your sides, and stamp your tipi!

Assemble by tying each bamboo stick to the string you sewed in when you were joining the sides, and use the twine to tie the top together. Finally, add a blanket and your pet.
As Bo is a big fan of hidey-holes (she loves cat beds), it didn't take long for Bo to start using her tipi. Even before I had finished it and put it up just to see what it would look like, she was eagerly trying it out and posing for the camera. Such a little poser.

Saturday, 5 October 2013

MISADVENTURES IN HOME BREWING PART TWO

 So last thursday was the big day—when our beer was finally ready to be tested. We started brewing it on the 8th of September, and bottled on the 21st of September. We had a great bottling system, where I would pour the bottles and hand them over to Graeme who would cap them. During this process, we both called dibs on two bottles: Graeme claimed the first bottle, while I claimed the first bottle I actually managed pour nicely (the ones before that were a bit hit and miss in terms of amount). So when Graeme left for the UK this week, he took his bottle with him so that we could have our big beer testing over FaceTime.


So If you read my previous post about how our misadventures in home brewing even started, you might be pleasantly surprised to hear it that the beer was definitely drinkable. Our first day of brewing was a bit of a shambles, and I’ll be the first to admit that we didn’t necessarily give the brew as much attention as we probably should have during the fermentation process either. I kept a brewing journal, but there’s a couple of times towards the end where we should have been keeping a close watch on our brew and measuring the gravity of it on a regular basis, but somehow we managed to forget about it for a couple of days. We also kept our brew in a room with heated flooring, which kept it at a temperature around 27°C, which was too high for an accurate hydrometer reading and probably a little warmer than it should have been in general. So all in all, our expectations for the beer were pretty low, and the fact that we actually produced a drinkable beer felt like quite the accomplishment!


And it was quite an enjoyable beer too! Having said that, our beer was pretty dark considering it was supposed to be an IPA. It looked more like a brown ale or something. It also had varying degrees of carbonation, in that Graeme’s bottle seemed pretty normal yet mine started fizzing like mad when I first uncapped it. Not sure why this happened, as we mixed in our priming sugar in the whole batch (rather than the individual bottles) before bottling to avoid this. But all in all, we're pretty happy, and I'm looking forward to enjoying a few of these this weekend. “We’ve done well, considering!”

UPDATE: So turns out we were a little bit early with our first tasting. After leaving the brew for a couple of weeks longer and having a second taste, we found that carbonation was more regular and the taste had developed significantly. Every day's a school day, right?

Wednesday, 2 October 2013

SEPTEMBER ON INSTAGRAM

September was a pretty good month. We had lovely weather for most of it and I’ve currently got three rolls of film getting developed from some of the photo adventures we went on. Graeme worked at the Nuart Festival in Stavanger where street artists from all over came to Stavanger and decorated the city. We also started our first batch homebrew, and even though we had a bit of a shaky start (LINK) we successfully bottled 42.5 bottles of IPA and we are looking forward to tasting them soon! We also had one of Graeme’s friends come visit us, which resulted in yet another trip to my parents cottage in the south of Norway, as well as a hike to the Pulpit Rock. Stunning views!

I had a bit of a sad start to October though, as Graeme left yesterday morning to go back to the UK to complete his final year of study. I’ll be visiting him very soon though, so looking forward to that. In the meantime, thank god for Skype and FaceTime!