Wednesday, 24 April 2013

SOURDOUGH STARTER PART TWO


So I guess it's time I posted an update on how my sourdough starter went! If you're a regular reader, you might know I started making a sourdough starter a while ago (if not you can read about it here!) now and should have been well into my sourdough bread baking by now. Whatever happend to that?


My first attempt, sadly, didn't quite work out. I named him Eric and the first couple of days he did great. I kept a daily record of the process as I went along, where I jotted down my observations. Kinda felt like I was back in school doing some sort of experiment for a science project! The mixture started bubbling and was smelling right and everything, but then it started separating. I didn't quite know what was happening as this wasn't mentioned in the recipe I was following, but thanks to Google I soon found out that this is something that often happens in the process. The liquid that separates is called hooch, and is an alcohol naturally produced in the fermenting process. Graeme somewhat jokingly suggested we try to drink it, which we then obviously did. I don't particularly recommend it for your next cocktail party. 


Either way, I learnt that hooch should be disposed of, and that if your starter is producing a lot of it then you should try feeding it more often. Eric was just telling me he was hungry! Phew! Panic averted. But then a couple of days later, actual disaster struck, and I hold myself completely responsible. I had a bit of a lay Sunday, and managed to forget to feed him. The next day, not only did I realize I'd forgotten to feed him, I realized I had also failed to close the lid properly. Result? Eric had thrown a tantrum and developed a gross case of mould. 

However, I've given it another shot and so far, my second attempt is going a lot better. I've learnt from my past mistakes and invested in a new jar that's easier to shut to avoid any airborne contamination. I've also put a reminder on my phone to prevent me from feeding him on the weekend. Eric Two appreciates this measures and is doing much better than his predecessor. However, I am currently on Day 7 and the process is going far slower than the recipe suggested, as so far there's only a small amount of bubbles. Clearly patience is key in this process!


Monday, 22 April 2013

FISHEYE BABY 110 PHOTOS

Lo and behold the cutest camera ever, the Lomography Fisheye Baby 110! Or at least the cutest camera in my camera collection. This little cutie boasts a 170-degree lens and can take both long exposures and multiple exposures! And it's so tiny, it fits so nicely in the palm of my hand. I feel a little bit like a spy when I'm using it! Graeme got me it for Christmas (we usually give each other some sort of camera or camera related item for Christmas, and he was very disappointed to not get one from me last year. Will have to make sure he doesn’t get disappointed next year!), and it’s pretty much taken me quite forever both to finish the film and to find somewhere in Stavanger to get it developed. I also managed to leave it in Glasgow for all of January which didn’t help. But here we are and I have finally managed to get a few pictures developed.


What I was most excited about with this camera though was the prospect of being able to take multiple exposures and long exposures, as Graeme already has a regular fisheye camera I sometimes like to borrow. For my first film I only tried a couple multiple exposures, but I'm a bit unsure about the results. I’m not entirely sure if this is down to the camera, the photographer or the developer, but a good few of my multiple exposures didn’t really end up overlapping they way I had expected them to, as you can see below. 


Anyone know why this happened? Is this yet another reason to finally set myself up with a darkroom like I’ve been talking about for years? I guess that’s the beauty of these toy cameras though, you never really know how the pictures are going to turn out! I’m excited about trying long exposures on my next roll though. Will let you know how that goes!

Wednesday, 17 April 2013

DIY WASHI TAPE MAGNETS

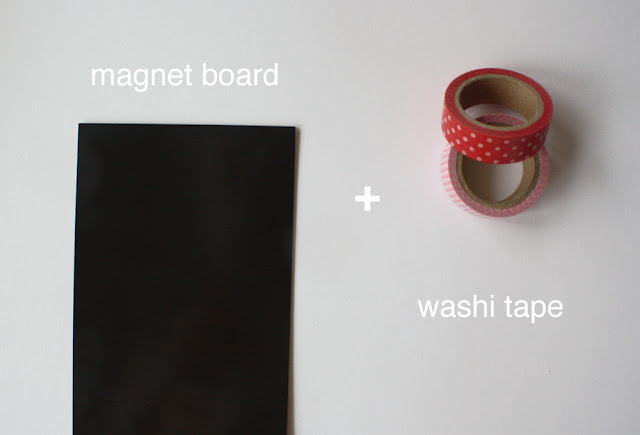
This is one of those super quick DIY projects that barely even need instruction, perfect for when you don’t have a whole lot of time but want to make something cute. Small changes are often still quite effective! I brought a bunch of photos with me when I moved over from Glasgow that I’ve been meaning to display on my fridge and have been thinking of doing some sort of magnet project for a while. I considered getting instagram photos printed as magnets, but figured photo magnets keeping photos in place might end up looking a bit overkill. I’ve seen lots of people use washi tape to just tape up pictures, but I didn’t really want the adhesive from the washi tape on my pictures. So instead I decided to try to make some magnets with my washi tape!


Directions: Stick bits of washi tape on magnet sheet and cut them out with scissors. I wanted a “torn tape” look for my magnets, so I spent a bit of extra time making sure I cut the magnets out according to the torn bits of washi tape. Obviously, if you just wanted strips with neat ages you could just cut them straight off. Repeat! Then stick on fridge!


On a completely separate note, I am working on a bit of a redesign for this blog. I recently got Photoshop (finally!), and have been messing around a bit with that. So stay tuned!

Sunday, 14 April 2013

GRAEME'S VEGETARIAN PULLED PORK RECIPE

Graeme is a vegetarian. I am not. I love vegetarian food though, and generally don’t eat a lot of meat. I don’t think I’d struggle too much if I were to follow a vegetarian diet, but the commitment phobe in me refuses to limit my diet in such a drastic way. If I crave meat, I eat meat. But if Graeme craves meat, sometimes he cooks up some vegetarian pulled pork. This is actually something he's started cooking after I moved out, but he tells me about it all the time. So now that he's visiting I decided to make him make it for me to see what all the fuss was about. And I must say it was pretty delicious! But what is in this vegetarian pulled pork recipe, you say? You’ll be happy to hear there’s no imitation meats or anything like that (I’m not the biggest fan of imitation meats myself). Instead, the recipe uses unripe jackfruit in place of the pork. I’ve never really used jackfruit in any cooking before, but as I understand it’s generally sold either as ripe jackfruit or as unripe jackfruit. Ripe jackfruit is generally used more for dessert recipes like custards or cakes, while unripe jackfruit like this recipes uses is often used in curries in various countries in south east Asia. It has a meat-life taste, hence why it’s the main ingredient in this vegetarian version of pulled pork.

The whole process of making this dish is pretty simple. You prepare the fruit, shallow fry it and then grill it in the oven for a few minutes. Majority of the flavor in this recipe relies on the sauce, so I’d recommend using a good one!


Graeme's Vegetarian Pulled Pork Recipe: 
1 tin unripe jackfruit (young green jackfruit in brine)
150 ml of your favourite BBQ sauce
cooking oil
rolls/buns/whatever you'd like with your meal


Directions: Start by preparing the fruit. First, drain each chunk by squeezing out any excess water. Use a grater to grate the core and any seeds onto a kitchen towel (to further drain any liquid), and separate the flesh of the jackfruit into shredded pieces.


Once you have your jackfruit all shredded up, fry in a lightly oiled pan on a medium high heat for about five minutes until it starts to go a little brown. Once you’ve got a little color, add the BBQ sauce and stir well to coat all the pieces, and fry for a further five minutes. Once the BBQ is well incorporated into the jackfruit, transfer to an oven tray lined with oiled aluminum foil, and spread it so that you have a relatively thin layer so the heat gets distributed evenly. Grill on a high heat for about 10 minutes or until it begins to get a little charred, occasionally stirring so that it gets evenly cooked.

Depending on what you serve this with (and your BBQ sauce), this could easily be adapted to suit a vegan diet. Serving this as a pulled pork sandwich with a side of coleslaw is a classic, but it also works great with pita bread or potato salad. We had ours with buns and grilled corn on the cob,  as I’m personally not a massive coleslaw fan.

Tuesday, 9 April 2013

PLAYING AROUND WITH REDSCALE FILM

Redscale film! Isn't it pretty? I love the effect. It's like everything is on fire, almost a bit apocalyptic. I'm so happy I finally found a place in Stavanger that were able to develop my 120 film!

These were shot with my Diana F+ and Lomography ISO 100 Redscale 120 film, when Graeme and I took Bo for a walk along the Clyde to Glasgow Green in early March. It was a beautiful day! The rowers were out on the river, and the park was full of people enjoying the sunshine.


 Think I'll def be buying more of this film!

Saturday, 6 April 2013

SOURDOUGH STARTER PART ONE


I’ve been wanting to experiment with trying to make my own sourdough starter for a while. It’s one of my favorite breads, and I find the whole process of making a sourdough starter intriguing. How you have to keep feeding them. How people keep them for years and years and they keep growing. I’ve heard people refer to their sourdough starters as their pets, and people who even go as far as to take them on holiday with them to make sure they get fed. Clearly it's worth trying out!

After researching a few recipes online, I finally decided to try a basic sourdough recipe from the Kitchn. I figured as this is my first try at making a sourdough starter, I should probably try out a simple one. This recipe has no strange and hard to find ingredients or complicated techniques, which was a bit of a selling point for me. It only has two ingredients, and then it's really just a waiting game.


Basic Sourdough Recipe (from the Kitchn)
1/2 cups flour
1/2 cups water (filtered or spring)

Directions: On day one, mix the flour and water until there are no lumps and you're left with a smooth batter. Transfer to an airtight container and leave it for 24 hours somewhere with a consistent room temperature. (The Kitchn also write that you can add a bit of yeast to the mix to kickstart the process, but I decided to omit this step and go for the real deal!). On day two, three, and four, add another 1/2 cup flour and 1/2 cup water to the mixture and stir well, making sure there are no flour lumps. You may start to see some bubbles already on day two, and it should be frothy and fermented and ready to use by day five.


As I've heard of so many who have tried and failed at making a sourdough starter, I'm gonna try not to be too defeated if this fails. I've already started looking for sourdough bread I want to try though, so hopefully it'll work out! I'll be posting a part two to this post to let you know how it goes!

Tuesday, 2 April 2013

MARCH ON INSTAGRAM

It's already April! It's been a pretty cold month, but it's finally starting to get warmer so spring is just around the corner! I'm definitely looking forward to the world getting a bit more green. It’s been a good month though, with a weekend trip to Oslo to go camping in the snow and watch the Skiing World Cup (I’m a complete snow camping convert!) and with Graeme coming to visit for Easter the past few days have been filled with photo adventures and lots of chocolate. Hope you’ve had a good March too!