Sunday, 28 October 2012

DAY OF THE DEAD COOKIES


It didn't even occur to us to have a Halloween party this year. I mean, we had one last year and it was great, but seeing as we have a few other things going on right now, it wasn't the first thing on our minds. Then a friend asked if we were planning on having one again this year. Not really sure what are plans are for Halloween, we answered, but a seed was sown. Then a second friend asked. But what finally converted us was when we saw the Halloween aisle in the supermarket and our heads started buzzing with ideas, we got all excited and remembered how much fun it is to throw a party, and a decision was made.


Of course, I pretty much started with my decorations straight away. Hello cobwebs, cut-out bats and creepy pickled faces! Of course I needed to make some Halloween themed edibles as well, and after perusing the internet I came across a recipe for little skull day of the dead cookies on 101cookbooks.com. They looked pretty fun and relatively straight forward to make, so I decided to give them a bash.

I was pretty happy with the results and the taste of the cookies exceeded my expectations. I mean, I picked the recipe mainly because the cookies looked cool, but it's always a bit of a downer when the taste doesn't quite hold up and you're left with a visually pleasing but meh-tasting cookie. These went down a treat with the party guests though, and I'll definitely be making these again. I didn't end up changing anything with the recipe, so the recipe below is the same only in metric measurements.

 Day of the dead cookies (recipe from 101 cookbooks):

Vanilla dough:
250 g flour
1/2 tsp baking powder
1/4 tsp salt
115 g butter
200 g sugar
1 egg
1 1/2 tsp vanilla extract

Chocolate dough:
125 g flour
60 g cocoa powder
1/2 tsp baking soda
1/4 tsp baking powder
1/8 tsp salt
115 g butter
90 g brown sugar
100 g sugar
1 egg
1 tsp vanilla extract

Directions: Start with making the vanilla dough. Mix flour, baking powder and salt in a bowl and set aside. Beat butter and sugar until creamy and fluffy in another bowl, and then add the egg and vanilla extract. Once it's all combined, add in the flour. Roll the dough into a sausage, cover in cling film and leave in the fridge. In a new bowl, start the chocolate dough in the same way. Mix flour, baking powder, baking soda, cocoa powder and salt in a bowl and set aside. Cream butter and sugars until fluffy, and add egg and vanilla. Once that's mixed in, combine the flour mix into the dough. Roll it into a sausage, cover in cling film and put in the fridge. This dough is a million times easier to work with when it's chilled (or even frozen), so leave it in the fridge for about two hours, or even over night if you have time.

The original recipe recommended shaping the dough and poking eye and mouth holes in the dough sausage before cutting, and then slicing using some floss or thread to prevent the cookies from losing their shape. However, I found that no matter how hard I tried, I ended up having to reshape the cookies post cutting, and I'd thus recommend just cutting normal cookie shapes, and then shaping them once assembled. That way you'd also avoid the issue of having a funny shaped vanilla cookie on top of a different funny shaped chocolate cookie. Don't try for perfection though, as the oddly shaped ones often turn out the creepiest! Bake for about 15 minutes in a preheated oven at 175 degrees Celsius. Makes about 36 cookies.


Tuesday, 23 October 2012

BOWS, BOWS, BOWS


On Tuesdays, if I can, I head over to Say it Ain't Sew at Hillhead Bookclub. It's a wonderful little sewing group lead by the lovely and talented Miss Iona Barker. It's completely free and all materials are provided and if you're nearby and enjoy sewing, I definitely recommend you pop by. Each week we usually have a little project, and last time we made bows. They're easy to do and super cute, so I figured I'd make some more of them.


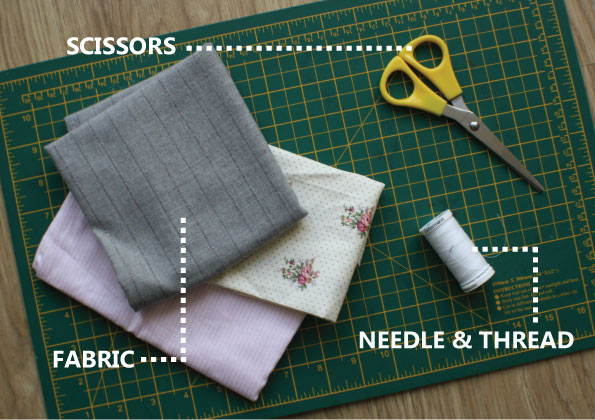
All you need for this project is scissors, needle and thread, and of course fabric of your choice. Pretty much any fabric will do, and you don't need a lot of it so this is great for using scrap bits of fabric you have leftover from a previous project.


Step 1: Cut a rectangle from your fabric. Since you're folding the fabric, your bow will roughly end up being half the size of the size of the fabric you cut. I made mine roughly 14.5 cm by 11.5 cm and ended up with a bow that measures roughly 7 cm across. Step 2: Fold the two longer edges in towards the middle. Step 3: Fold the shorter edges in towards the middle. Step 3: Stitch down the centre, connecting your two folds. You could skip this step if you want, but I find it makes the bowl a little more durable, as well as a little easier to handle for the next steps.

Step 5: Pinch together the fabric in the middle. Step 6: Make a couple stitches and wrap the thread around a couple times, and make a few more stitches to secure it. Step 7: Get a separate piece of fabric, and fold to fit. Step 8: Wrap the folded piece of fabric around the centre of the bow, and stitch to secure. Loop off to finish.


You can attach a bobby pin to the back and use for your hair, or you can sew a strap or an elastic to the back and wear as a bow tie. Christmas present for your dad, perhaps?


Monday, 22 October 2012

CHILLI LIME KALE CRISPS


Lo and behold—kale! A vegetable of near mystical powers, crammed full of calcium and vitamin K and C and a bunch of other stuff that I have no idea what actually is but that I’ve been lead to believe is really good for you. It's a few months since I was in Dublin and came across a bag of vegan spicy kale crisps in a local shop. At first I found the taste a bit unusual, but then I realised I wanted more of the flavour. You know, when you've finished chewing and swallowed and the taste starts to fade, it’s like your mouth starts missing it and you have to have another bite? Anyway, before I knew it the whole bag was gone and I had to go get more. 

These crisps aren't exactly like the ones I had in Dublin, but my batch disappeared just as quickly. These are tossed with olive oil and seasoning and then baked in the oven until crisp. The seasoning is a salt mix I'm also somewhat obsessed with these days. The below measurements will give you far too much for your kale, but don't worry, it pretty much goes on everything. I've been putting it on boiled eggs, baked potatoes, roast vegetables, popcorn--it adds a lovely bit of tang to just about everything.


Chili and lime kale crisps recipe (method adapted from Smitten Kitchen):

200 g kale (I used curly kale, but I’m sure any kale would do)
olive oil
4 tbsp flaky sea salt
zest from 1 lime
1 tsp dried coriander
1 tsp hot chilli powder (more or less, depending on how spicy you like it)
sunflower seeds (optional)

Directions: Preheat oven to 150⁰ celcius. Zest your lime into a bowl. Add salt and stir until evenly distributed.  Add coriander and chillipowder and mix. Rinse kale and remove the stems. My kale was already chopped but if yours is in larger pieces, you might want to chop or tear these to a more bite friendly size. Put kale in a bowl and toss with a splash of olive oil and the salt mix. Line a baking sheet with aluminum foil for easy clean up, and spread out a layer of kale. Leave in the oven for about 20 minutes. Take it out halfway through baking, stir and turn the tray around so the heat gets evenly distributed. Once baked, empty in a bowl and sprinkle on some sunflower seeds for extra crunch. 

Tuesday, 16 October 2012

CHOCOLATE COFFEE CAKE

Today is Graeme's birthday. For a very long time, he was very against having any sort of celebrations. I wasn't even allowed to bake him a cake. Of course, I did not agree with this anti-birthday rebellion. And seeing as I've been watching a lot of shows on the food network recently, I really wanted an excuse to bake a cake. So eventually, last night, he agreed to letting me bake him a chocolate coffee cake with a dark chocolate ganache, as he saw a recipe for it in my copy of Baked Explorations by Matt Lewis and Renato Poliafito. A last minute emergency trip to the supermarket to buy the needed ingredients followed.

I ended up changing a couple things in the recipe though. For example, the recipe calls for shortening and corn syrup, two ingredients I'm not a massive fan of cooking with. Not that I even think I can get them here--do they sell this in the UK? I also struggled to find the ingredients needed for the coffee buttercream, and thus abandoned their recipe all together and used my usual and much simpler buttercream recipe. It's also supposed to be a three layer cake using 8 inch cake tins. The recipe tells you to get out your three 8 inch cake tins and bake all the cakes at once. I only have a 9 inch cake tin, and I only have one, so I decided to make it a two layered cake.

So after some present unwrapping, a birthday breakfast trip to Tribeca and a bit of thrift shopping, my cake baking commenced. The process pretty much took me all day and when I was done the sun had set hours ago, hence why the photo of the final product isn't the greatest.


Monday, 15 October 2012

HILDE AND THE BIRD PARADE

I love surprises. What I love even more, is when Past Hilde surprises Future Hilde. Past Hilde knows Future Hilde so well. And today, Past Hilde had arranged a very exciting surprise for Future Hilde, and pre-ordered Hilda and the Bird Parade by Luke Pearson. Don't you love it when you pre-order something, forget all about it and then the postman delivers it and you get all excited again?

I'm a huge fan of Luke Pearsson's graphic novels. He's done quite a few different ones, but my favorites are the Hilda-series and I have them all, Hildafolk, Hilda and the Midnight Giant and now Hilda and the Bird Parade. I'll admit--when I first bought Hildafolk, I bought it mainly because of the name of the character, and the fact that it was about a girl who ran around in the mountains and drew rocks and hung out with trolls and stuff. I mean, that's basically what I spent my childhood doing in Norway. More or less, anyway. Not to mention how Hilda has a little friend called Twig--it's Bo, hello! But I absolutely love the style of the drawings too. The style and charactures reminds me a lot of Moomin by Tove Jansson, which was a favorite of mine as a child. And I love how Luke Pearson uses colour too, keeping to a palette and using different shades within it.


I can't wait to enjoy this on the couch, wrapped up in a blanket with a hot cup of tea! And I really hope Luke Pearson keeps making these, so Past Hilde can surprise Future Hilde again!